Tuesday, November 15, 2011

Sparkling Christmas and a bit of intrigue...

Are you ready to continue our Christmas Marathon? =)
Today we'll show you two more cards with sparkling papers and coloured images:
To make these cards i've used stamped images of Magnolia and Whiff of Joy, coloured with ProMarkers.
Also:
- Basic Gray paper
- multi-colored sparkling paper
- Marta Stewart border punch
- white embossing powder to make congratulatory inscription
- die-cut branches
- some lace
- siver embossing powder, film for a laser printer and circle punch to make snowflakes
And intrigue is that the third card we'll show you in our next challenge - don't miss it ;)
Happy crafting!

Monday, November 14, 2011

Christmas Cards Time =)

Hello everyone!
Christmas is getting closer, so it's time to make some Christmas cards now? =)))
Today i'd like to show you two of them:
 To make these cards i've used:
- white embossing powder
- one Martha Stewar border punch
- some lace and brads
Details:
 Volume effect:
 Happy crafting!
@->-

Wednesday, November 9, 2011

Christmas ornament Tutorial


Holidays are right around corner, aren't they?...
So many things we want to do....
We want to make everyone we love to feel special.
Well, I want to suggest making Christmas ornaments together as a family, or as a personal ond loving gifts to your family members and friends.

I got on e-bay plain circle coasters, they are so cheap! :)
And you'll need some doilies, pretty picture like the one I have used from Crafty Secrets,
 pieces of ribbons,
flowers, buttons, feathers-whatever you have around the house:)


You'll also need some glue,
double sided sticky tape
scissors
and if you really want to be fancy, or you are a scrapper like me-UTE (Ultra Thick Embossing Enamel)
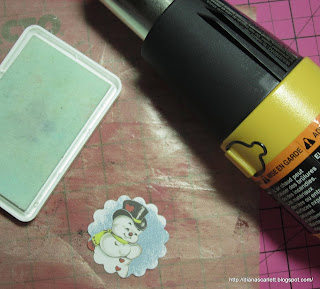
Heat gun
chalk
Eyelet and eyelet stetting tool
circle puncher might be of a use ;)
and here is what you do:

Take the coaster, and a pritty patterned paper (I have used Anna Griffin Willow collection) from patterned paper I cut out a circle larger then my coaster (about 1inch larger in diameter)
Then I glued coaster to the paper, right in the center


Then I have cut up sections of paper into "flaps" and glued all around coaster.

When I was done with that , I glued my doily right in the center with double sticky tape
set the eylet with eylet setting tool
Next step you might want to skip, if you are the begginer, and just glue your image in the center of the doily.
But, if you are willing you can do heat embossing with UTEE( I did 3 layers of UTEE on my piece), afterwards the heating process place your image in the refregitrator for a few minutes,then remove from cold  and push with your finger as much as you can, to crack the enamel

Then I used some of the wet chalk to make my image more "vintage"
just by rubbing chalk over the cracked image
Proceed to decorate to your taste
Here you can see the crackle effect of UTEE
And, this is my finished gift:

Could be a lovely and memorable gift to someone who has a new baby  boy in the family;)
Happy crafting everyone!
Hugs
Dianascarlett
P.S.
For russian speakin readers I had this MK done in russian, and you can read about it here:

МК подвески на елку

Tuesday, November 8, 2011

Something different

I don't know about you all, but I am always "itching" to try new stuff-even if I totally suck at it ;p
Well, I did wanted to try myself at Steampunk style too....  And here rose an occasion, my husband's nephew's B-day. Tim is a car mechanic, so.... I thought this would be a good one for him :)
I was inspired by this tutorial : "steampunk"


here are some inside details:

Friday, November 4, 2011

Secret message game

This is my take on this game:
Someone, soon will get this card-sssh... it's a secret who will get it-and I HOPE this someone will like it.
And here are some details close up:


Here I have used some Prima paper
Ranger ink pads
Image is by: Abrakadabra Stamp Makers
Sawing machine
embossing powder in  Ranger Worn Lipstick
Little stamps are from Crafty Secrets

“Secret Message”,

We suggest you to play the exchange game “Secret Message”, but it is not an ordinary exchange, it is a “secret” one!
The content of it can be briefly described like this: you join a project (here or in somebody’s blog, where you see the invitation to the game), then you receive three addresses from a person who invites you, send one card to the first address you see in the list and cross this address out. Then you write your own address to the end of the list, find two or three people who want to join too and in short time enjoy the effect, starting to get cards from different places of the world. Ideally you’ll get 27 cards.

Rules
1. In this game we exchange only hand-made message cards. What’s their difference from usual greeting cards? Their aim is not to congratulate somebody, but to pass certain idea, thought. You have to send your partner a message, emotion or mood, not just a pretty meaningless card. You can use any technique for your message card – drawing, collage, scrapbooking or whatever you like. These beautiful cards can be regarded as examples of a message card (each picture is a link to its author):
(The rest of the rules at the end of the post)
The rest of the rules:
2. You’ll have to make and send only one card. Put your message card in an envelope.

3. The décor of message cards. Size – 10*15 cm. It must contain an image of a MAIN CHARACTER (a person or a part of his or her body: eye, hand etc, maybe an animal or a bird or even some thing, if it expresses your idea. The presence of some TEXT (at least one word) is also obligatory. There are no restrictions as for materials and techniques used. At the back of your card you MUST write or print your name and surname, e-mail and blog address. Any other additions – as you like. You have to make and send your card within 7 days.

4. Very important – manipulations with addresses: when you receive a letter-invitation to the game, you’ll find there a description of the game and three addresses of players. You send one message card to the FIRST address in the list. This player has “played”, and you delete his or her address, adding your own address instead AT THE END OF THE LIST. Therefore you correct the list of addresses:  the second one becomes the first, the third one becomes the second and your address is the third and last. It means that in each email, sent in the game, there are always three addresses. And you send the same e-mail with three corrected addresses to two or three new players.

5. How can I find new players? Create a post like this in your blog and ask people to join us, then send the list of addresses to two or three people wishing to play. Be careful choosing new players (you should trust them) and don’t forget that if you invite an unfair person, the chain will be broken and some people won’t receive cards they wait for. If you can’t find new players, you can look at the posts 
“I want to play” and “I want to invite to the game” in the blog of the game.

6. How it works? Three players get your address as the third, 9 – as the second, and 27 – as the 1st in the list. If everybody fulfils all rules correctly, you get handmade 27 cards from different places of the world in exchange for your only card.  

7. How can I enter a game? You can leave a comment in any blog, where this post is published. Don’t get upset, if you can’t join the game right now. According to the law of geometric progression the number of posts offering to play will grow immensely. You can leave your comment in the post “I want to play” and wait till somebody invites you.

8. You can play the game as many times you want, if you join different chains and send your card in each one.

9. Please follow the rules carefully. For each card made and sent you should send only three emails with addresses. If you want to get more cards – join another team.

10. After receiving each card please find an opportunity to visit a sender’s blog and inform his or her that a card was delivered successfully.


11. Be ready to send a card to any address in any country you get. Joining the game, remember, that somebody’s little happiness depends on you. You have only to be very careful with addresses and to make and to send ONLY ONE card, it's so easy! So please do not fail!


ATTENTION: ! The result of a game is unpredictable, if you are not ready to take risk and you are interested in the result only, it is better not to enter the game.
The aim is not getting loads of cards but the process of the game itself. You don’t know a person you send your message to, and you don’t know how many cards exactly you get and who sends them to you. But you know that somebody will be very happy to receive your letter, and it is great, isn’t it?

You have something to tell about? You don’t wait for award, but you like surprises? Then our game is just what you need.

P.S. Don’t forget to take our banner to your blog so that many people can learn about our game and join us!

Tuesday, November 1, 2011

"Greetings from Wonderland" card.

Hello! =)
Today it's me, Elanor-limyr and my new card made with "Greetings from Wonderland", Clear Art Stamps.


Here i used also:
- Pixie Glen Collection, Mulberry Paper 6"x6"
- Prima, Window View, Pixie Glen Collection
- Prima, roses
- garden branch by Marianne D
- some brads
- 2 border punches by Martha Stewart and Fiskars.

Happy crafting! =)

LinkWithin

Related Posts Plugin for WordPress, Blogger...